Automatic layout testing with BackstopJS
Hi, developer!
A frequent problem of a layout designer is that he corrects styles in one place, but he sees changes in several places. And the layout designer notices it too late. In this post, I will talk about regression testing. The essence of the method is that you take screenshots of the site (not manually of course), and then after making any edits you make new screenshots and compare them with the previous ones. If there are any differences - the tests talk about it and show it. You can take screenshots both of sites and individual blocks.
For this method we need:
- Gulp - build system. If you are not familiar with the gulp, you can read the article “Getting Started with gulp” in our blog”.
- PhantomJS - these are all WebKit goodies from a console running on JS and supporting various standards and technologies: DOM, CSS, JSON, Canvas and SVG. Technically, it is a regular browser, but without a user interface.
- CasperJS - a tool for writing navigation scripts and for testing.
- BackstopJS - library allows you to automate the tasks listed above.
Installation
Install gulp:
npm install gulp -gInitialize npm at the root of your project:
npm initInstall PhantomJS:
npm install phantomjsCasperJS:
npm install -g casperjsCasperJS also requires the installation of python, a version that is not lower than 2.7.
Install BackstopJS via bower:
bower install backstopjsInstall the backstopjs npm dependencies:
cd bower_components/backstopjs
npm install
Test run
Now all commands are launched from the bower_components/backstopjs. First, let’s create a config for BackstopJS. To do this, use the following command:
gulp genConfigThe command creates a json file in the root of your project - backstop.json with the following contents:
{
  "viewports": [
    {
      "name": "phone",
      "width": 320,
      "height": 480
    },
    {
      "name": "tablet_v",
      "width": 568,
      "height": 1024
    },
    {
      "name": "tablet_h",
      "width": 1024,
      "height": 768
    }
  ],
  "scenarios": [
    {
      "label": "My Homepage",
      "url": "http://getbootstrap.com",
      "hideSelectors": [],
      "removeSelectors": [
        "#carbonads-container"
      ],
      "selectors": [
        "header",
        "main",
        "body .bs-docs-featurette:nth-of-type(1)",
        "body .bs-docs-featurette:nth-of-type(2)",
        "footer",
        "body"
      ],
      "readyEvent": null,
      "delay": 500,
      "misMatchThreshold" : 0.1,
      "onBeforeScript": "onBefore.js",
      "onReadyScript": "onReady.js"
    }
  ],
  "paths": {
    "bitmaps_reference": "../../backstop_data/bitmaps_reference",
    "bitmaps_test": "../../backstop_data/bitmaps_test",
    "compare_data": "../../backstop_data/bitmaps_test/compare.json",
    "casper_scripts": "../../backstop_data/casper_scripts"
  },
  "engine": "phantomjs",
  "report": ["CLI", "browser"],
  "cliExitOnFail": false,
  "casperFlags": [],
  "debug": false,
  "port": 3001
}
We will return to this file a bit later, and for now, pay attention to the following parameter:
"port": 3001This is the port number where our screen comparison page will be located. If you use browsersync on a project, I advise you to change the port number (so that project browsersync does not conflict with the browsersync library):
"port": 3002Next step, run the test server (also from the bower_components / backstopjs folder):
gulp startThis command starts the test server. In the browser, open the page http://localhost:3002/compare.
You should see something like this:
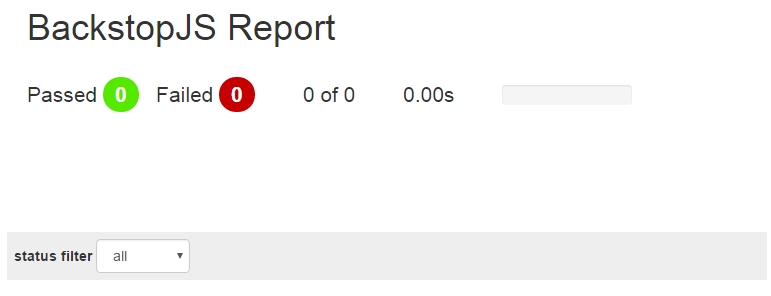 We have not made a single test so far.
Making the original screenshots
First of all, in the config file, we need to describe at what permissions we want to get snapshots.
backstop.json:
{
"viewports": [
    {
      "name": "phone",
      "width": 320,
      "height": 480
    },
    {
      "name": "tablet_v",
      "width": 568,
      "height": 1024
    },
    {
      "name": "tablet_h",
      "width": 1024,
      "height": 768
    }
  ]
}
Let us add another resolution - for the desktop:
{
"viewports": [
    {
      "name": "phone",
      "width": 320,
      "height": 480
    },
    {
      "name": "tablet_v",
      "width": 568,
      "height": 1024
    },
    {
      "name": "tablet_h",
      "width": 1024,
      "height": 768
    },
    {
      "name": "desctop",
      "width": 1280,
      "height": 1024
    }
  ]
}
Also, describe the screenshots of which blocks we need.
{
"selectors": [
        ".wrapper",
		".header"
    ]
}
Describe the blocks that we don’t want to see in the screenshots, for example, the browsersync widget:
{
"removeSelectors": [
				".widget_wrap",
				"#__bs_notify__"
			]
}
We also write the page address in the url parameter (in my case it is http: // localhost: 1337). Final backstop.json:
{
	"viewports": [
		{
			"name": "phone",
			"width": 320,
			"height": 480
		},
		{
			"name": "tablet_v",
			"width": 568,
			"height": 1024
		},
		{
			"name": "tablet_h",
			"width": 1024,
			"height": 768
		}
	],
	"scenarios": [
		{
			"label": "My Homepage",
			"url": "http://localhost:1337",
			"hideSelectors": [],
			"removeSelectors": [
				".widget_wrap",
				"#__bs_notify__"
			],
			"selectors": [
				".wrapper",
				".header"
			],
			"readyEvent": null,
			"delay": 500,
			"misMatchThreshold": 0.1,
			"onBeforeScript": "onBefore.js",
			"onReadyScript": "onReady.js"
		}
	],
	"paths": {
		"bitmaps_reference": "../../backstop_data/bitmaps_reference",
		"bitmaps_test": "../../backstop_data/bitmaps_test",
		"compare_data": "../../backstop_data/bitmaps_test/compare.json",
		"casper_scripts": "../../backstop_data/casper_scripts"
	},
	"engine": "phantomjs",
	"report": [
		"CLI",
		"browser"
	],
	"cliExitOnFail": false,
	"casperFlags": [],
	"debug": false,
	"port": 3002
}
Next step, run the command to compile the initial screenshots:
gulp referenceAfter it is worked out, in the root of your project, images will appear in the backstop_data / bitmaps_reference folder. These pictures are our sources, which we will compare new screenshots with in the future.
Testing
To run the tests run the command:
gulp testThe http://localhost:3002/compare/ window will open automatically (if not, open manually) and the test results will be displayed. Since we have not changed anything yet, all the tests will be successful:
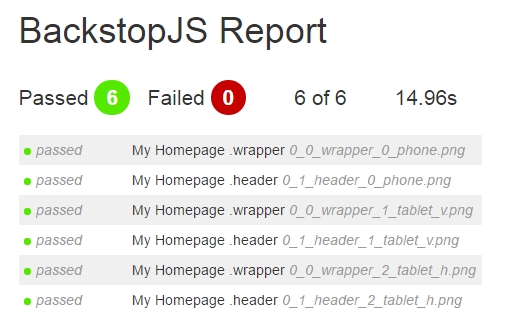 In the table below, we clearly see the original screenshot, the new screenshot and the difference between them. Pay attention to the parameter misMatchPercentage - this is the percentage of screenshots mismatch.
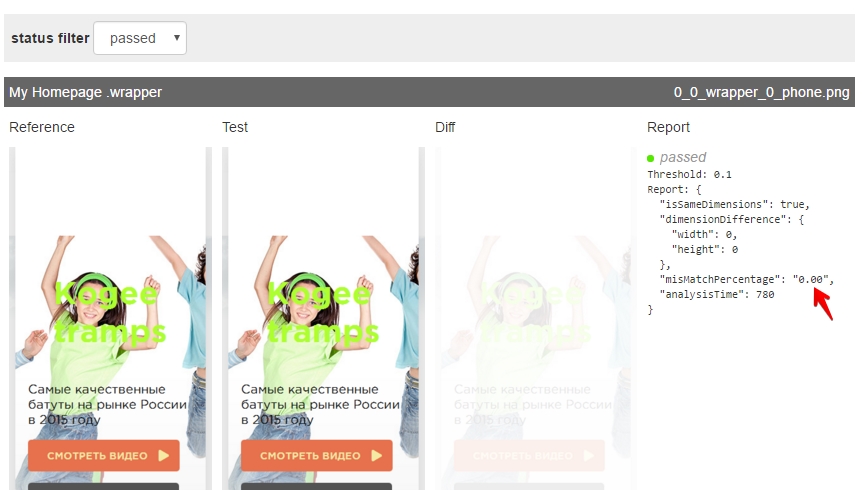 Now let’s change something in the project, for example, I will change the colour of the title and its indent.
It was:
.promo_title {
	font-size: 7.1rem;
	color:greenyellow;
	padding:4rem;
}
It became:
.promo_title {
	font-size: 7.1rem;
	color:black;
	padding:5rem;
}
Now run the test again:
gulp testWe see that some tests did not pass:
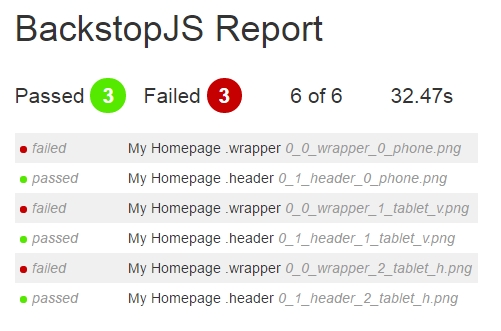 Below are the results of fallen tests:
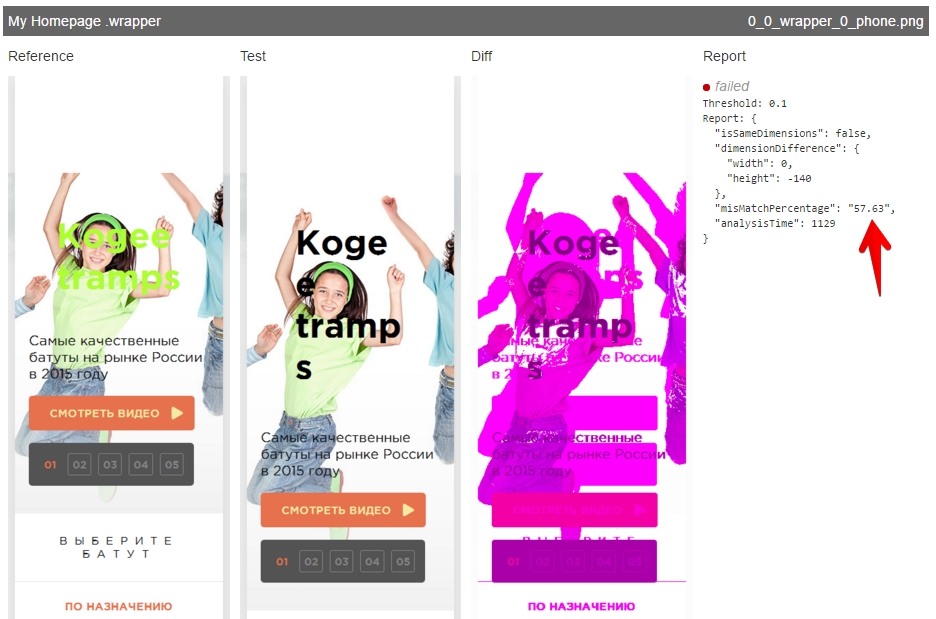 The misMatchPercentage (percentage of screenshots mismatch) is now quite large, that is why the tests have fallen. You can configure the mismatch threshold in the backstop.json config:
{
	"misMatchThreshold": 0.1
}
Page interaction
If you need to take some action with the page before you take a screenshot, CasperJS will help you. You can read more detailed on how to work with it in the documentation. For example, I want to open a pop-up window with a directory, and only then take a screenshot. In this case, we need to create the opening and waiting script in 1 second in the backstop_data / casper_scripts folder.
openCatalog.js:
module.exports = function(casper, scenario, vp) {
	casper.click( '#catalog_show' );
	casper.wait(1000);
};
In the config script add script:
{
	"onReadyScript": "openCatalog.js"
}
Now, the directory will open before taking a screenshot.
Taking a screenshot at the right time
If you want to delay the time of the screenshot, you can do this using the delay parameter in the config (default 500). Or you can specify in your js-file when to take a screenshot. For example:
$(window).on('load', function () {
	console.log('page_loaded');
});
And change the parameter “readyEvent” in the config:
{
	"readyEvent": "page_loaded"
}
Run the tasks from a root of the project
Before that, we ran gulp-tasks from the bower_components / backstopjs folder. In order to run the task from the root, you can use the gulp-chug plugin. Let’s install:
npm install gulp-chug --save-devNow we need to write a dependency: var chug = require(‘gulp-chug’); then write a task:
//gulp chug (BackstopJS: $ gulp reference)
gulp.task( 'reference', function () {
    gulp.src( './bower_components/backstopjs/gulpfile.js' )
        .pipe( chug({
        tasks:  [ 'reference' ]
    }));
});
At the end, we have the following in gulpfile:
var gulp = require('gulp'),
	chug = require('gulp-chug');

gulp.task( 'genConfig', function () {
	gulp.src( './bower_components/backstopjs/gulpfile.js' )
		.pipe( chug({
			tasks:  [ 'genConfig' ]
		}));
});

gulp.task( 'reference', function () {
	gulp.src( './bower_components/backstopjs/gulpfile.js' )
		.pipe( chug({
			tasks:  [ 'reference' ]
		}));
});

gulp.task( 'test', function () {
	gulp.src( './bower_components/backstopjs/gulpfile.js' )
		.pipe( chug({
			tasks:  [ 'test' ]
		}));
});
Now you can run commands from the project root.
Fonts
At the time of writing this article, phantomJS has a problem with fonts in the modern format woff, woff2. In order for everything to work correctly, you need to connect older formats.
That’s all.