Shopify: add the site search
In this article we will edit the template search.liquid where the user can find the store goods, pages, and blog articles.
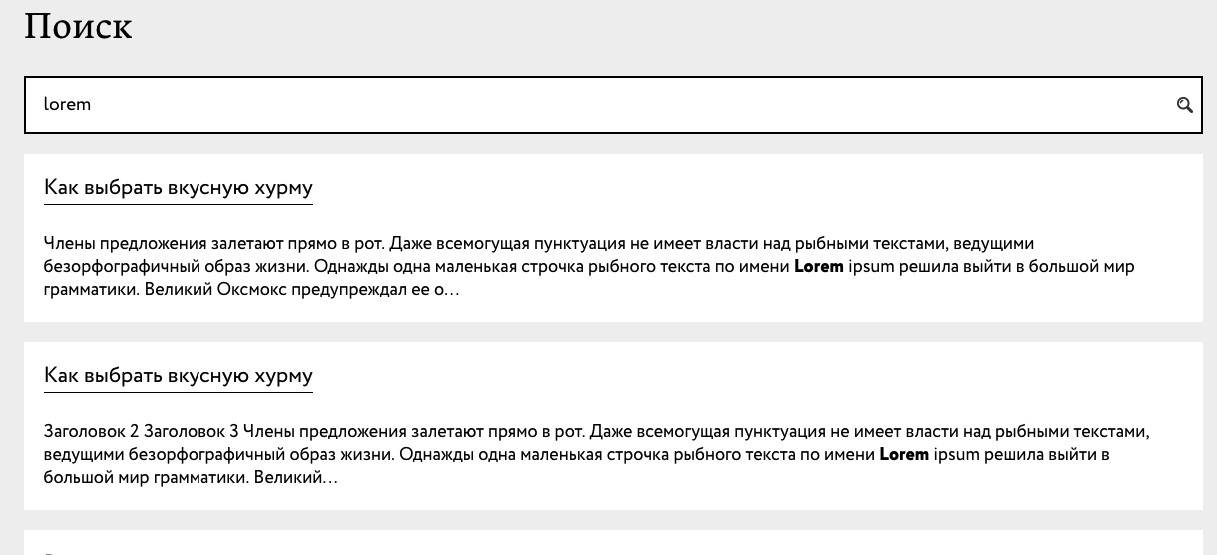
At the result you should get the following:
Now let’s go to “yourshop-name.com/search” to see the search page.
1.Adding the search form
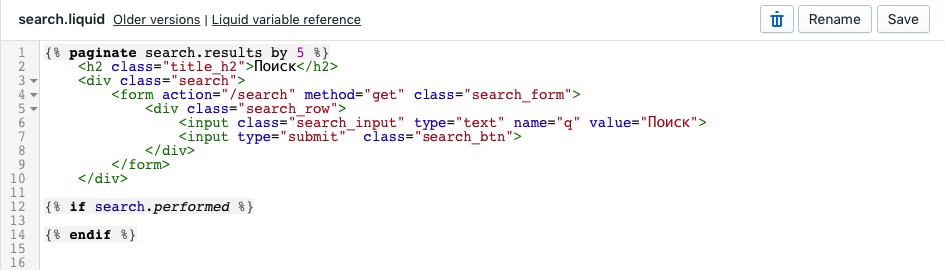
The first we need to do is to add the search form. Open the file search.liquid, and change its content on the following code:
<h2 class="title_h2">Search</h2>
<div class="search">
	<form action="/search" method="get" class="search_form">
		<div class="search_row">
			<input class="search_input" type="text" name="q" value="Search">
			<input type="submit"  class="search_btn">
		</div>
	</form>
</div>
Now on the page you can see this simple form:

The interface of the form will depend on whether you have prescribed some styles for it or not, but in this article we will not focus on the styles.
2.Checking whether the search was completed
Before bringing up the content of the search, it will be usefull to do a good check whether the search request was actually sent or not. We do this to avoid searching for empty strings when you click from search page. Add the code below after block with form:
{% if search.performed %}

{% endif %}
We should get the following:
For now, don’t pay attention on the paginate search.results code, we will talk about it later.
The code if search.performed returns true, if the form with attribute action = / search was successfully sent.
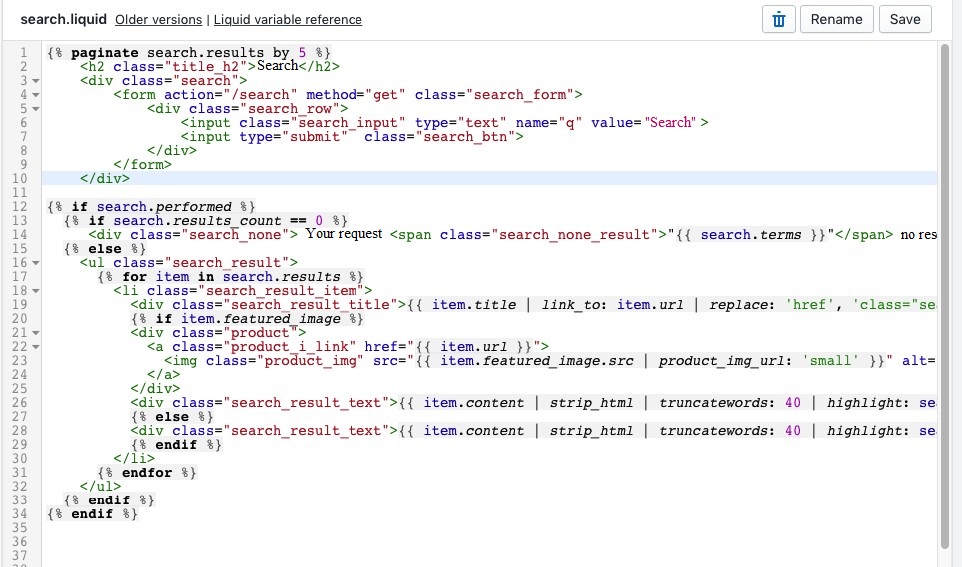
3.Display the search result through a cyclic path
Now let’s add the cycle for to display the search result. We want to look through the «results» array, which is the part of the search object, to see whether we have something to display or not. Enter the following code inside the construction we have added above:
{% if search.performed %}
	{% if search.results_count == 0 %}
		<div class="search_none">Your request <span class="search_none_result">"{{ search.terms }}"</span> no results.</div>
	{% else %}
		<ul class="search_result">
			{% for item in search.results %}
				<li class="search_result_item">
					<div class="search_result_title">{{ item.title | link_to: item.url | replace: 'href', 'class="search_result_link" href' }}</div>
					{% if item.featured_image %}
						<div class="product">
							<a class="product_i_link" href="{{ item.url }}">
								<img class="product_img" src="{{ item.featured_image.src | product_img_url: 'small' }}" alt="{{ product.featured_image.alt | escape}}">
							</a>
						</div>
						<div class="search_result_text">{{ item.content | strip_html | truncatewords: 40 | highlight: search.terms }}</div>
						{% else %}
							<div class="search_result_text">{{ item.content | strip_html | truncatewords: 40 | highlight: search.terms }}</div>
					{% endif %}
				</li>
			{% endfor %}
		</ul>
	{% endif %}
{% endif %}
We should get the following:
Now, using the form we have made earlier, let’s find the text ‘lorem’, I have it in the articles of the blog.
The search result will be the following:
The result of the search, mainly our text ‘lorem’, wraps into the tag strong with highlight level, and we can stylize this level.
This highlightning is done with filter highlight.
More additional information about filtres you can find in documentation: https://help.shopify.com/themes/liquid/filters/additional-filters More about the object search: https://help.shopify.com/themes/liquid/objects/search
Let’s speak about the code more detailed.
{% if search.results_count == 0 %}If there is no result, you will see div with the text that there is nothing on this request.
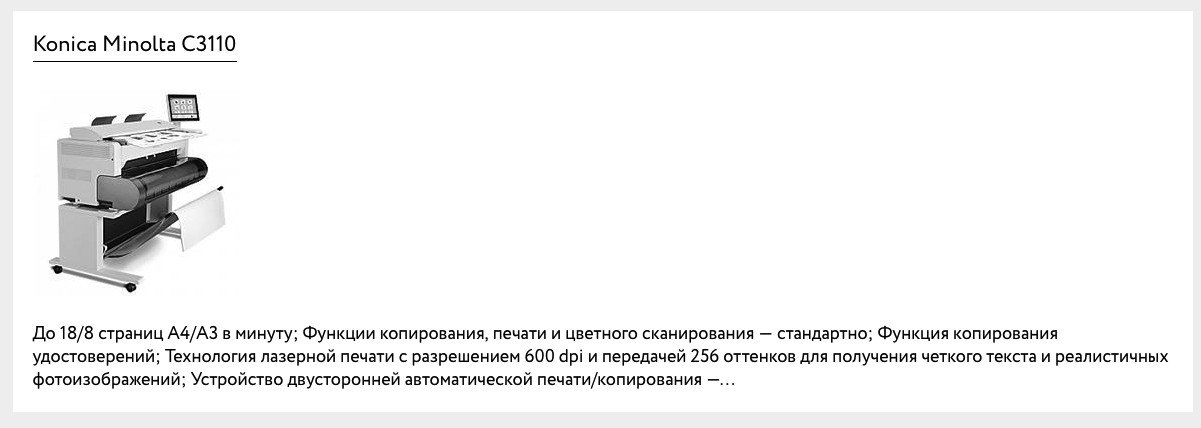
{% if item.featured_image %}This code checks if the search result has featured_image (means the image of the product). It checks whether the product is the result of the search or not.
If the search result is a product, then we want to display a proper image and a description to it. If we prescribe the name of the product in search, we will have the following picture:
If the search result isn’t a product, we display only page text or the articles of the blog. Also, if you don’t have any searching results, you will see next message:

4.Adding the pagination for search results
{% paginate search.results by 5 %}

{% endpaginate %}
Here we point that want to see only 5 search results, the rest will be on the other pages.
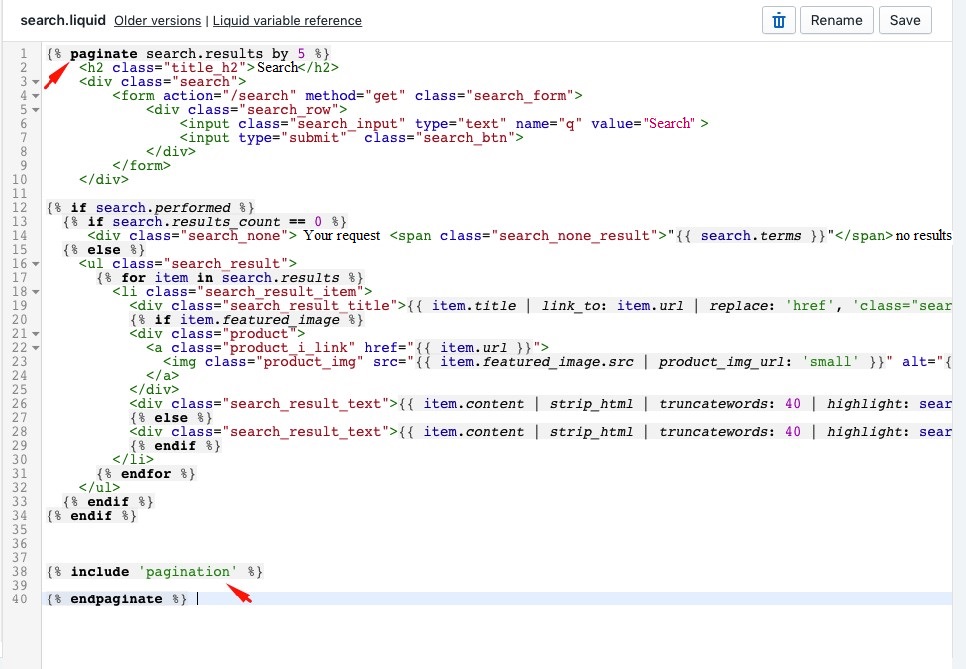
What does include ‘pagination’ mean?
{% include 'pagination' %}The snippets that are in the folder Snippets with the resolution liquid connect in this way, in particulary I have there pagination.liquid file. We won’t speak about the code of pagination because it’s quite easy, but you can find information about it [here]https://gist.github.com/jsnord/69ce7677efc08886e319bfbc2529878c
5.Conclusion
You can add this form with search wherever you want, for example, in header, in footer, it doesn’t matter, the main is to have ‘action=”/search” method=”get”’ in the attributes, and the input must have the attribute name with the value “q”. If you have this, everything will work well.